|
|
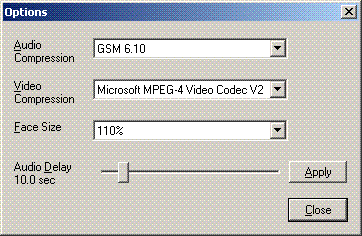
Option
|
Description
|
| 1.
|
Audio Compression
|
Select an audio compression for your video here. Select "MP3" if you have it. If not, the next recommended selection is "GSM 6.10".
|
| 2.
|
Video Compression
|
Select an video compression for your video here. The
recommended selection is "Microsoft MPEG-4 Video Codec V2" or other "MPEG-4" compression, or "Microsoft Video 1".
|
| 3.
|
Face Size
|
Select how much your face image will be bigger than the face pattern within the video template. The recommended selection is "110%" so that your face image can superimposed over the face pattern and cover the face pattern well.
|
| 4.
|
Audio Delay
|
Select how long your audio, music or sound will delay playing when your created video starts playing. Usually it is 0.0 sec or 5.0 sec. A better way is to use a sound editor to add in the few seconds of silence to your audio, music or sound.
|

 or click:
 [Options] button to open the Options Window
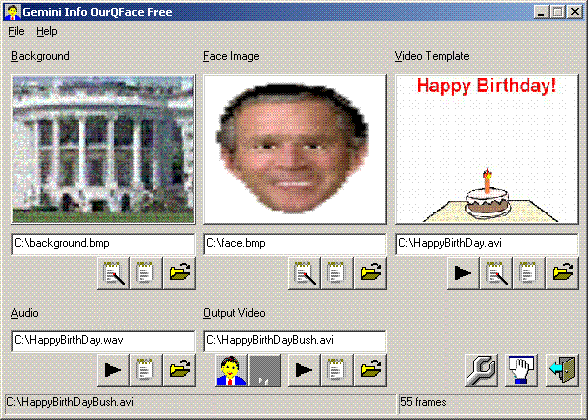
 [Create Video] button to start creating your video with sound
 [Play] button at bottom-middle of the OurQFace window to play and test your created video.
 button at the top-left corner of the OurQFace window. You may then click the neighbouring
  button to edit the background image.

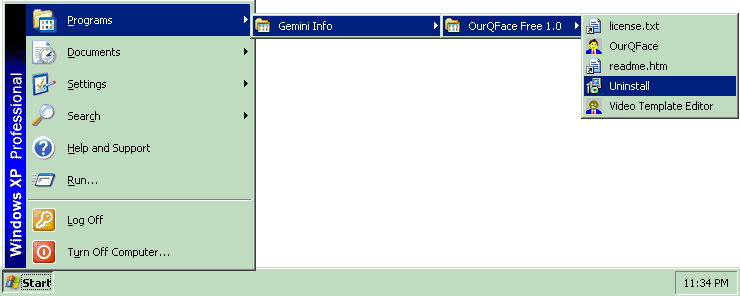
 [Exit] button.